


How to Use a Portable Jump Starter: Complete Beginner's Guide
A portable jump starter is one of the most valuable tools you can keep in your car. Unlike traditional jumper cables, you don't need a second vehicle — just the jump starter and your dead battery. This guide walks you through everything from first setup to successfully jump starting your vehicle, even if you've never done it before.
Getting Started: First Setup
Step 1: Charge Your Jump Starter Fully
Before you ever need it, charge your jump starter to 100%. Most units come with a partial charge, but a full charge ensures maximum cranking power. Plug it in using the included charger (usually a USB-C or barrel plug) and wait until the LED display shows full charge — typically 3-4 hours.
Important: Use only the charger that came with the unit. Third-party chargers may deliver the wrong voltage and damage the battery.
Step 2: Familiarize Yourself with the Components
Before you're in an emergency situation, take 5 minutes to understand your jump starter:
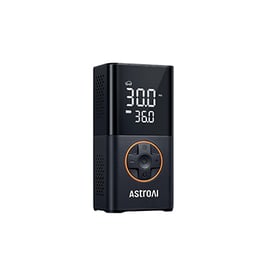
- Main unit: Contains the lithium battery, BMS, and control electronics
- Smart clamps/cables: Heavy-duty cables with positive (red) and negative (black) clamps
- LED display or indicators: Shows battery level, error codes, and status
- Power button: Turns the unit on/off
- Boost button (if equipped): Forces output for very dead batteries
- USB ports: For charging phones and other devices
- LED flashlight: For nighttime use
- Type-C charging port: For recharging the jump starter itself
Step 3: Test the Unit
Turn on the jump starter and check that the display shows at least 3 out of 4 battery bars. Press the flashlight button to test the light. This quick check confirms everything is working before you need it in an emergency.
Step-by-Step: Jump Starting Your Vehicle
Step 1: Prepare the Vehicle
Before connecting anything:
- Turn off the ignition completely — remove the key from the ignition.
- Turn off all accessories: headlights, radio, AC, dome light, phone charger.
- Open the hood and locate the battery.
- Inspect the battery for damage (cracks, swelling, leaks). If damaged, do not jump start — call a tow truck.
- Clean any corrosion from the battery terminals with a wire brush or rag. Good contact is essential.
Step 2: Connect the Jump Starter
Follow this exact sequence:
- Turn off the jump starter — don't connect clamps while the unit is on.
- Connect the red clamp to the positive (+) terminal of your car battery. Squeeze the clamp firmly onto the terminal for good metal-to-metal contact.
- Connect the black clamp to an unpainted metal surface on the engine block or chassis — not the negative battery terminal. Look for a solid metal bracket, bolt, or engine lift point at least 12 inches from the battery.
- Turn on the jump starter. Wait for the green "ready" light or indicator.
If the jump starter beeps or shows a red light/error code, check these common issues:
| Error | Meaning | Solution |
|---|---|---|
| Reverse polarity alarm | Clamps connected backwards | Swap red and black clamps |
| No light / no response | Battery too dead to detect | Use boost mode if available |
| Red flashing light | Short circuit detected | Check for touching clamps |
| Over-temperature warning | Jump starter too hot | Wait 5 minutes and retry |
Step 3: Start the Engine
Once the jump starter shows green/ready:
- Turn the ignition key to start (or press the start button).
- Crank for a maximum of 5 seconds. The engine should start within 1-3 seconds.
- If the engine doesn't start, wait 30 seconds, then try again.
- Do not attempt more than 5 times. If the engine won't start after 5 tries, the issue is likely not the battery — could be the starter, fuel system, or ignition.
Step 4: Disconnect the Jump Starter
Once the engine is running:
- Turn off the jump starter before disconnecting clamps.
- Remove the black clamp from the engine ground first.
- Remove the red clamp from the battery's positive terminal.
- Store the clamps in their designated holder on the jump starter.
Step 5: Let the Engine Run
Keep the engine running for at least 20-30 minutes to let the alternator recharge the battery. Highway driving is more effective than idling. If you turn off the engine too soon, the battery may not have enough charge to restart.
Using Boost Mode for Very Dead Batteries
If your car battery is very deeply discharged (below 5V), the jump starter may not detect it and will refuse to output power. In this case:
- Connect the clamps as normal (red to positive, black to engine ground).
- Turn on the jump starter.
- If it shows no response or an error, press and hold the boost button for 3 seconds.
- The display should show "BOOST" or a similar indicator.
- Immediately attempt to start the engine within 30 seconds.
- Boost mode bypasses some safety checks, so only use it when standard mode fails.
After the Jump Start: Recharging and Maintenance
- Recharge your jump starter immediately after use. Each jump uses 3-5% of the battery. Don't wait until you need it again to discover it's low on charge.
- Set a reminder to recharge every 3 months. Even when not in use, lithium batteries slowly self-discharge. A quarterly recharge keeps the battery healthy.
- Store at room temperature (50-77°F / 10-25°C). Avoid leaving the jump starter in a hot car during summer or a freezing car during winter.
- Check the charge level monthly — if it drops below 50%, recharge it.
Advanced Features: Getting More from Your Jump Starter
USB Power Bank Mode
Most jump starters include USB output ports for charging phones and tablets. This is useful in emergencies when your phone is also dead. However, frequent USB use drains the jump starter battery — don't rely on it as your primary power bank.
LED Flashlight Modes
Most units include a flashlight with multiple modes: steady beam, SOS, and strobe. In a nighttime roadside emergency, the strobe mode can alert other drivers to your presence.
12V DC Output
Some jump starters include a 12V cigarette lighter output for powering small accessories. This can run a portable air compressor for tire inflation — another common roadside emergency.
Troubleshooting: When It Doesn't Work
| Problem | Likely Cause | Solution |
|---|---|---|
| Jump starter won't turn on | Battery dead or over-discharged | Charge for 30 min, then retry |
| Green light but engine won't crank | Poor clamp connection | Clean terminals, reposition clamps |
| Engine cranks but won't start | Fuel or ignition issue | Check fuel, spark plugs — not a battery issue |
| Jump starter shuts down mid-crank | Overheating or low battery | Wait 5 min, recharge, retry |
| Error code on display | Various — check manual | Consult the user manual for code meaning |
If you're consistently having trouble with your jump starter, it may be time to upgrade to a more powerful model. Browse our jump starter collection for reliable, high-performance options.
Frequently Asked Questions
Can I use a portable jump starter in the rain?
Yes, but minimize water exposure. Keep the main unit dry and ensure clamps make good contact. Most jump starters have some moisture resistance, but they're not waterproof.
How long does it take to jump start a car with a portable jump starter?
The actual jump starting process takes about 2 minutes — 1 minute to connect clamps and 1 minute to crank the engine. The longest part is usually finding and cleaning the battery terminals.
Do I need to remove the jump starter before starting the engine?
No. Keep the jump starter connected during the start attempt. Remove it only after the engine is running and after turning off the jump starter.
Can I jump start a car with a completely dead battery (0V)?
Most jump starters need at least 2-5V from the car battery to detect polarity. For completely dead batteries, use boost mode if available, or pre-charge the battery with a trickle charger first.
Is it safe to leave a jump starter connected to the battery overnight?
No. Always disconnect the jump starter after use. Leaving it connected risks draining the jump starter's battery or causing a short if the clamps shift.